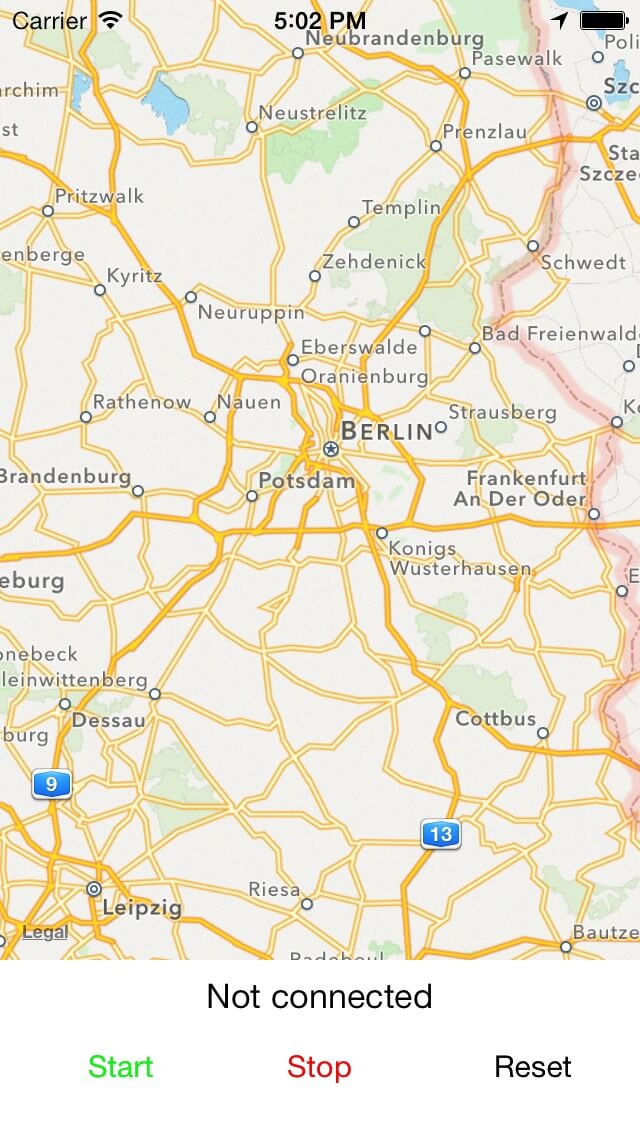
客户端程序是这个项目的一个组成部分,这个项目能将目的地的坐标发送给无人机上绑定的电话。 整个过程是个很简单的任务,而其中又不乏有趣的部分,例如使用新的( iOS7 上的)Multipeer Connectivity API 和 NSSecureCoding。
这个程序最后表现的界面很简单,但却不太漂亮:

多点连接
为了创建客户端和无人机上的导航程序之间的连接,我们打算使用新的 Multipeer Connectivity 的 API。 为了做到这一点,我们只需相互连接两个设备, 所以 multipeer API 在这里并不能完全发挥它的潜力。但是如果更多的客户端要加入的话,代码实际上是一样的。
发送
我们决定让客户端程序作为发送端,而无人机上的导航程序作为浏览接收端。客户端使用以下简单的语句来开始发送:
NSString *displayName = [UIDevice currentDevice].name;
self.peer = [[MCPeerID alloc] initWithDisplayName:displayName];
self.advertiser = [[MCNearbyServiceAdvertiser alloc] initWithPeer:self.peer     discoveryInfo:nil serviceType:ServiceTypeIdentifier];
self.advertiser.delegate = self;
[self.advertiser startAdvertisingPeer];
一旦另一台有同样服务类型的浏览客户端的设备发现了发送端, 我们就会收到一个代理回调函数以便建立连接:
- (void)advertiser:(MCNearbyServiceAdvertiser *)advertiser didReceiveInvitationFromPeer:(MCPeerID *)peerID withContext:(NSData *)context invitationHandler:(void (^)(BOOL accept, MCSession *session))invitationHandler
{
    self.session = [[MCSession alloc] initWithPeer:self.peer];
    self.session.delegate = self;
    invitationHandler(YES, self.session);
}
一旦我们收到邀请,我们就建立一个新的会话对象,设置我们自己为会话的代理,并且通过调用 invitationHandler 并将 YES 和会话做为参数传递,来接受邀请。
为了能在屏幕上显示连接状态,我们要实现另一个会话代理方法。因为我们只能连接到一个另外的设备,所以我们仅使用当前已连接的节点数量作为标示,标示大于 0 代表已连接:
- (void)session:(MCSession *)session peer:(MCPeerID *)peerID didChangeState:(MCSessionState)state
{
    [[NSOperationQueue mainQueue] addOperationWithBlock:^{
        NSString *notificationName = session.connectedPeers.count > 0 ?
                            MultiPeerConnectionDidConnectNotification :
                            MultiPeerConnectionDidDisconnectNotification;
        [[NSNotificationCenter defaultCenter] postNotificationName:notificationName object:self];
    }];
}
因为六分之五的 MCSessionDelegate 协议里的方法都是必须的,所以尽管我们没有特别的目的要使用他们,我们也必须把那些协议都加上。
这时候,连接建立好以后,我们就能使用会话的 sendData:toPeers:withMode:error: 方法传递数据。我们会在后面部分更多的探讨这个内容。
浏览接收
运行在飞行器手机上的导航程序必须通过给客户端发送邀请来初始化连接。做法同样直白,第一步是启动扫描节点。
MCPeerID* peerId = [[MCPeerID alloc] initWithDisplayName:@"Drone"];
self.browser = [[MCNearbyServiceBrowser alloc] initWithPeer:peerId     serviceType:ServiceTypeIdentifier];
self.browser.delegate = self;
[self.browser startBrowsingForPeers];
一个节点被发现以后, 我们就获得一个代理回调函数,而且能邀请该节点加入我们的会话:
- (void)browser:(MCNearbyServiceBrowser *)browser foundPeer:(MCPeerID *)peerID withDiscoveryInfo:(NSDictionary *)info
{
    self.session = [[MCSession alloc] initWithPeer:peerId];
    self.session.delegate = self;
    [browser invitePeer:peerID toSession:self.session withContext:nil timeout:0];
}
一旦客户端发送数据,我们就能从会话的代理方法 session:didReceiveData:fromPeer: 接收到这些数据。
传输数据
多点会话中的每个节点能很方便地使用 sendData:toPeers:withMode:error: 方法发送数据。 我们只需要考虑如何打包数据来传输。
一个通常的选择是简单的编码为 JSON。 尽管这对于我们的目的简单易行, 但是我们想要做一些更有趣的办法,使用 NSSecureCoding. 这对于我们的例子来讲实际上并没有什么差别, 但是如果你想要传输更多的数据,这将是比编解码 JSON 更有效的方式。
首先,我们创建一个类,用来打包我们要发送的数据:
@interface RemoteControlCommand : NSObject <NSSecureCoding>

+ (instancetype)commandFromNetworkData:(NSData *)data;
- (NSData *)encodeAsNetworkData;

@property (nonatomic) CLLocationCoordinate2D coordinate;
@property (nonatomic) BOOL stop;
@property (nonatomic) BOOL takeoff;
@property (nonatomic) BOOL reset;

@end
为了使 secure coding 有效(确保收到的数据使我们期望收到的类型),我们需要添加 supportsSecureCoding 类方法到我们的实现中:
+ (BOOL)supportsSecureCoding;
{
    return YES;
}
接下来,我们要添加方法来编码一个对象的实例并把它打包成一个NSData对象使其能够通过多点连接发送。
- (NSData *)encodeAsNetworkData;
{
    NSMutableData *data = [NSMutableData data];
    NSKeyedArchiver *archiver = [[NSKeyedArchiver alloc] initForWritingWithMutableData:data];
    archiver.requiresSecureCoding = YES;
    [archiver encodeObject:self forKey:@"command"];
    [archiver finishEncoding];
    return data;
}

- (void)encodeWithCoder:(NSCoder *)coder;
{
    [coder encodeDouble:self.coordinate.latitude forKey:@"coordinate.latitude"];
    [coder encodeDouble:self.coordinate.longitude forKey:@"coordinate.longitude"];
    [coder encodeBool:self.stop forKey:@"stop"];
    [coder encodeBool:self.stop forKey:@"takeoff"];
    [coder encodeBool:self.stop forKey:@"reset"];
}
现在我们能简单地用几行代码发送控制指令:
RemoteControlCommand *command = [RemoteControlCommand alloc] init];
command.coordinate = self.location.coordinate;
NSData *data = [command encodeAsNetworkData];
NSError *error;
[self.session sendData:data toPeers:self.session.connectedPeers withMode:MCSessionSendDataReliable error:&error];
为了使接收端能够解码数据,我们要添加另一个类方法到我们的 RemoteControlCommand 中:
+ (instancetype)commandFromNetworkData:(NSData *)data;
{
    NSKeyedUnarchiver *unarchiver = [[NSKeyedUnarchiver alloc] initForReadingWithData:data];
    unarchiver.requiresSecureCoding = YES;
    RemoteControlCommand *result = [unarchiver decodeObjectOfClass:self forKey:@"command"];
    return result;
}
最后,我们需要实现 initWithCoder: 来让已被编码的对象能从数据中解码出来。
- (id)initWithCoder:(NSCoder *)coder;
{
    self = [super init];
    if (self != nil) {
        CLLocationCoordinate2D coordinate = {};
        coordinate.latitude = [coder decodeDoubleForKey:@"coordinate.latitude"];
        coordinate.longitude = [coder decodeDoubleForKey:@"coordinate.longitude"];
        self.coordinate = coordinate;
        self.stop = [coder decodeBoolForKey:@"stop"];
        self.takeoff = [coder decodeBoolForKey:@"takeoff"];
        self.reset = [coder decodeBoolForKey:@"reset"];
    }
    return self;
}
综合试一试
现在,我们在这有了多点连接并且我们能编解码远程控制指令,我们已经为无线发送位置坐标和控制指令做好了准备。 为了解释这个例子,因为其他指令也是完全一样的,我们只是看一下坐标的传输。
像在项目概述里讨论过的那样,为了使这个飞行器导航测试简单一点,这个客户端程序可以发送当前的地理位置或者是地图上的选点。 在第一种情况,我们仅需要实现 CLLocationManager 的代理方法 locationManager:didUpdateLocations: 并在属性里存储当前坐标:
- (void)locationManager:(CLLocationManager *)manager didUpdateLocations:(NSArray *)locations
{
    self.location = locations.lastObject;
}
我们设置一个定时器来定期发送当前位置:
- (void)startBroadcastingLocation
{
    self.timer = [NSTimer scheduledTimerWithTimeInterval:1 target:self selector:@selector(broadcastLocation) userInfo:nil repeats:YES];
}
最后,broadcastLocation 方法每一秒调用一次,会创建一个 RemoteControlCommand 对象而且把它发送到已连接的节点:
- (void)broadcastLocation
{
    RemoteControlCommand *command = [RemoteControlCommand alloc] init];
    command.coordinate = self.location.coordinate;
    NSData *data = [command encodeAsNetworkData];
    NSError *error;
    [self.session sendData:data toPeers:self.session.connectedPeers withMode:MCSessionSendDataReliable error:&error];
    if (error) {
        NSLog(@"Error transmitting location: %@", error);
    }
}
大概就是这样。跟随着阅读关于飞行器上导航软件和用于与飞行器通信的 Core Foundation 网路 API 的其他几篇文章能了解这些与飞行器交互的指令接收端并且能真正让它起飞!
